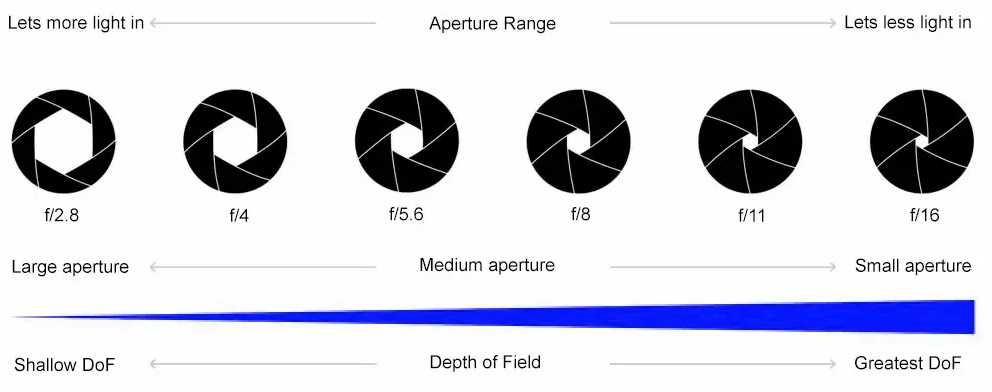
In photography, a photographer has to constantly play with three elements: ISO (light sensitivity of the sensor), shutter speed (how fast the aperture opens and closes), and F-stop (how wide or narrow the aperture opens).

In this exercise, we are playing with two different elements: The F-stop and the ISO. The shutter speed will be constant (1/60)

For normal, event photography, I like having my shutter speed no slower than 1/60. If it’s slower, I might get fussy photos because the camera moves every time I press the shutter button.

My models’ name is Cat, and all the photos were taken on the top of the Mont-Royal mountain, Montreal.
The aperture is simply the size of the opening in the lens, and learning how it works will help you create the depth and light you need for beautiful photos.
Ideally, for portrait photography, you would like to get a wide aperture to create a shallow depth of field. That means that you want to highlight the subject and you would want the rest of the photo to look fuzzy.
For landscape photography, would like to have a narrow aperture and a deep depth of field. This means that objects in the foreground and in the background would look sharp.
I like to have a narrower aperture when I am photographing a group of people the is several rows deep. For example, people in the front sitting down, people of medium size in the middle, and tall people in the back. On this occasion, I want everyone’s face to be sharp. Maybe an f-7 is good. You will have to experiment.
In these photos, we are not able to see a great difference in the depth of field. I will try it again when I will have different objects in the background.

