
Make a statement with your wedding stationery with this InDesign menu template in just a few easy steps.
This menu format measures 9 in x 4 in, which makes it easy for you and other users to print at home.
For other menu design ideas go to this website and let me know which one you like. I can do a similar (or better) design for less money.
For my own resources, this is a link to the images I will be using.
Setting Up a Wedding Menu Template File in InDesign
Step 1
In InDesign, go to File > New. Name the document wedding menu template. Set the file to the following dimensions:
- Width to 4 in
- Height to 9 in
- Orientation to Portrait
- Units to Inches
- Pages to 1
- Uncheck Facing Pages
- Columns to 1
- Margins to 0.5 in
- Bleeds to 0.125 in (it’s best to seek your professional printer’s preference)
Click Create.
Step 2
Organizing layers is an important practice when designing an InDesign template.Bring up the Layers panel by going to Window > Layers. Double-click on Layer 1 and rename it Background.
Step 3
On the Layers panel main menu, select New Layer. Name it Copy. Click OK.
Create a new layer named Images. Click OK.
2. Designing Your Wedding Menu Layout in InDesign
Step 1
On the Layers panel, select the Background layer.
To Place an image, press Command-D. Locate the Watercolor pink backgroundsfolder and select the 7.jpg file. Click Place.
Step 2
Click on the InDesign menu template to place the image. Using the Direct Selection Tool (V), resize the frame to cover the width of the wedding menu template and extend it to the bleed.
Step 3
Head over to the Layers panel and lock the Background layer. Select the Copy layer.
Step 4
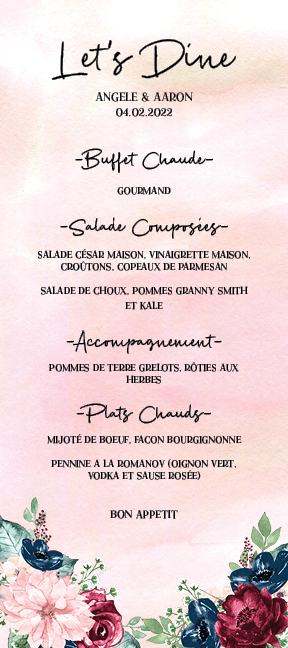
Using the Text Tool (T), create a text frame at the very top of the InDesign menu template. Use the side margins to help you place the text box in the center of the page. Add text—in this case, I’ve added ‘Let’s Dine!’
Step 5
Open the Character panel by going to Window > Type & Tables > Character panel.
On the Character panel, set the Font to Cest Lavie Regular and the Size to 40 pt.
On the Control bar, set the Alignment to Center.
Step 6
Create a text box under the title using the Text Tool (T). Here, we will include the couple’s name and date on two lines.
On the Character panel, set the Font to Cest Lavie Serif and the Size to 10 pt.
On the Control bar, set the Alignment to Center.
Step 7
Create a text box under the names using the Text Tool (T). Here, we will include the menu for the day. We will use a combination of the Regular and Serif family. Add copy, and let’s start formatting:
- Subtitle: Add a hyphen before and after each subtitle as this will help create emphasis. Set the Font to Cest Lavie Regular and the Size to 20 pt.
- Menu items: set the Font to Cest Lavie Serif and the Size to 8 pt.
On the Control bar, set the Alignment to Center.
Step 8
Create a text box under the menu with the Text Tool (T). Include a line such as ‘Bon Appetit’.
On the Character panel, set the Font to Cest Lavie Serif and the Size to 10 pt.
On the Control bar, set the Alignment to Center.
Step 9
Head over to the Layers panel and lock the Copy layer. Select the Images layer.
Step 10
Press Command-D to Place an image on the InDesign menu template. Locate the arrange_6.png file and click Open.
Step 11
Click on the menu layout to place the image.
Head over to the Control panel and activate the Constrain Proportions button. Set the Percentage to 45%.
Place the image on the bottom left corner of the menu. Make sure that the image is touching the bleed marks.
Step 12
Press Command-D to Place an image on the menu card template. Locate the arrange_5.png file and click Open.
Click on the InDesign menu template to place the image.
Head over to the Control panel and activate the Constrain Proportions button. Set the Percentage to 55%.
Place the image on the bottom right corner of the menu. Make sure that the image is touching the bleed mark.
